Getting started
This guide takes you from signing up to a live store. You can do most of it in one sitting, and you can add products while your details are being reviewed, so nothing has to wait.
What you need
Before you start, gather these:
- The phone number you signed up with.
- Your PAN.
- Bank account number and IFSC for payouts.
- A pickup address the courier can collect from.
- Your FSSAI number, if you sell food.
- Your GSTIN, if you have a GST registration.
1. Set up your store
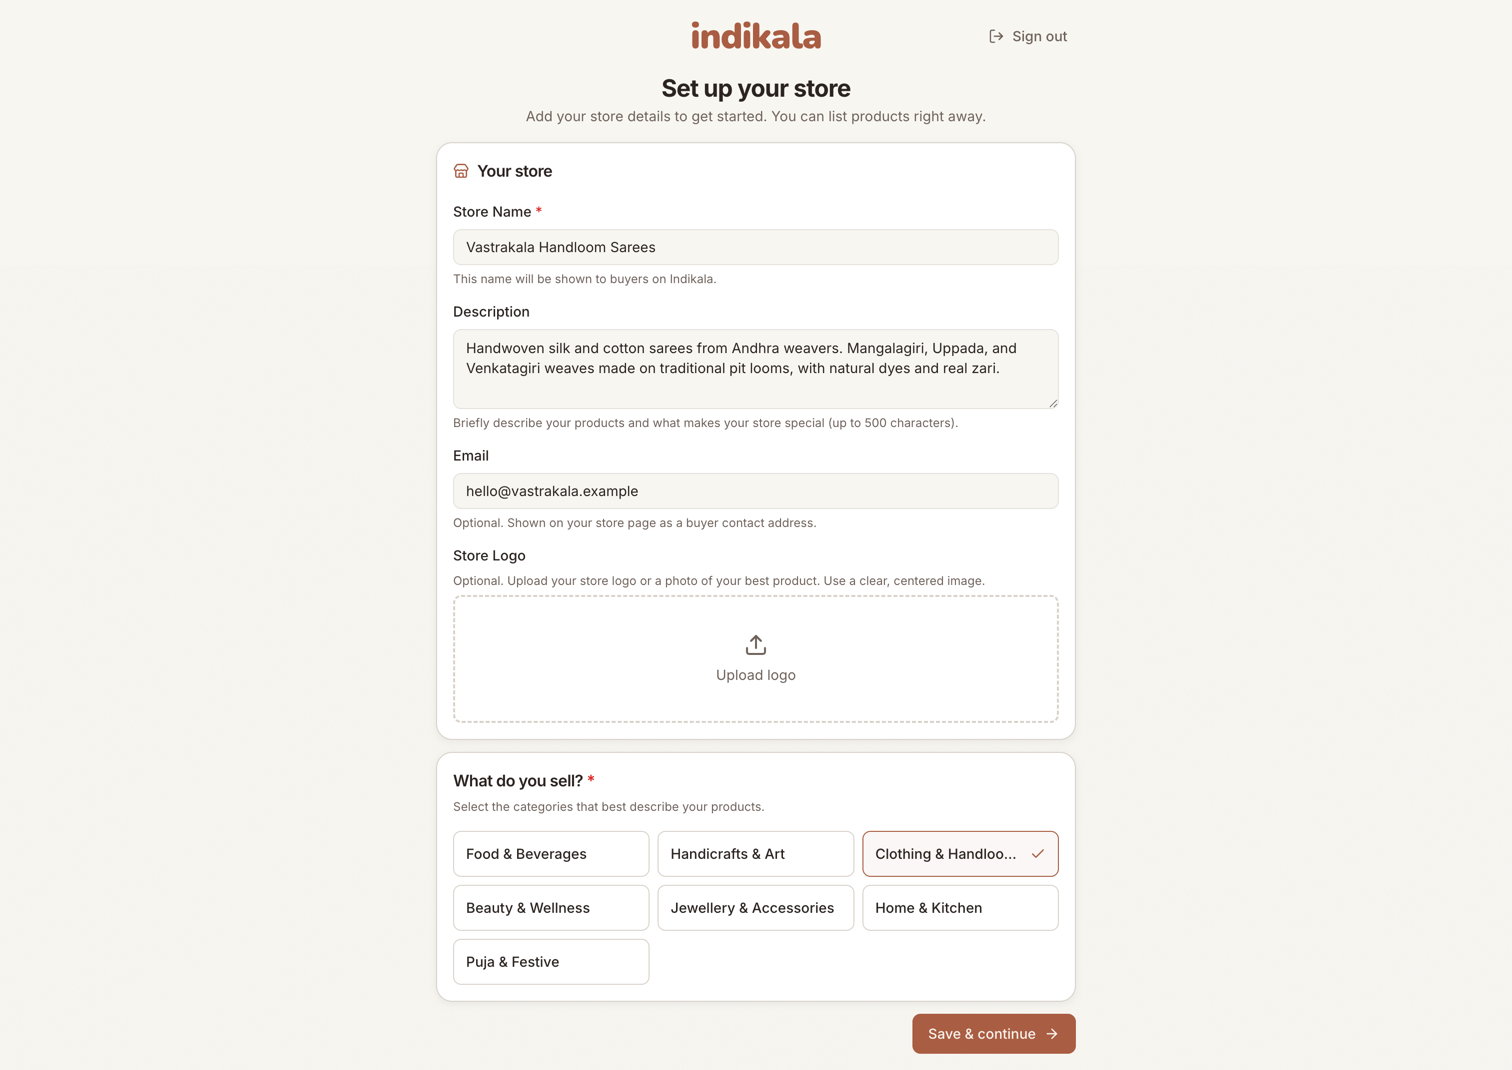
When you first sign in, you land on the store setup screen. This is short on purpose. You give us:
- Store name. This is the name buyers see. Pick the name you want to be known by. You can change it later in Settings, but pick something you will keep.
- Logo. A clear, square image works best.
- Store description. A line or two about what you make.
- Category. The main type of product you sell, for example food and beverages, or handicrafts. This is about your store, not any single product. You still set a category on each product later.
- Email. For order and account updates.
Save this and you land on your dashboard. Your store is not live yet, but you can start adding products right away.
2. Finish your KYC
KYC is how we confirm you are a real seller before money starts moving. Open the KYC page from the sidebar. It runs in four steps, with a progress bar at the top: business details, bank details, pickup address, and a final sign-and-submit. The next three sections walk through them.
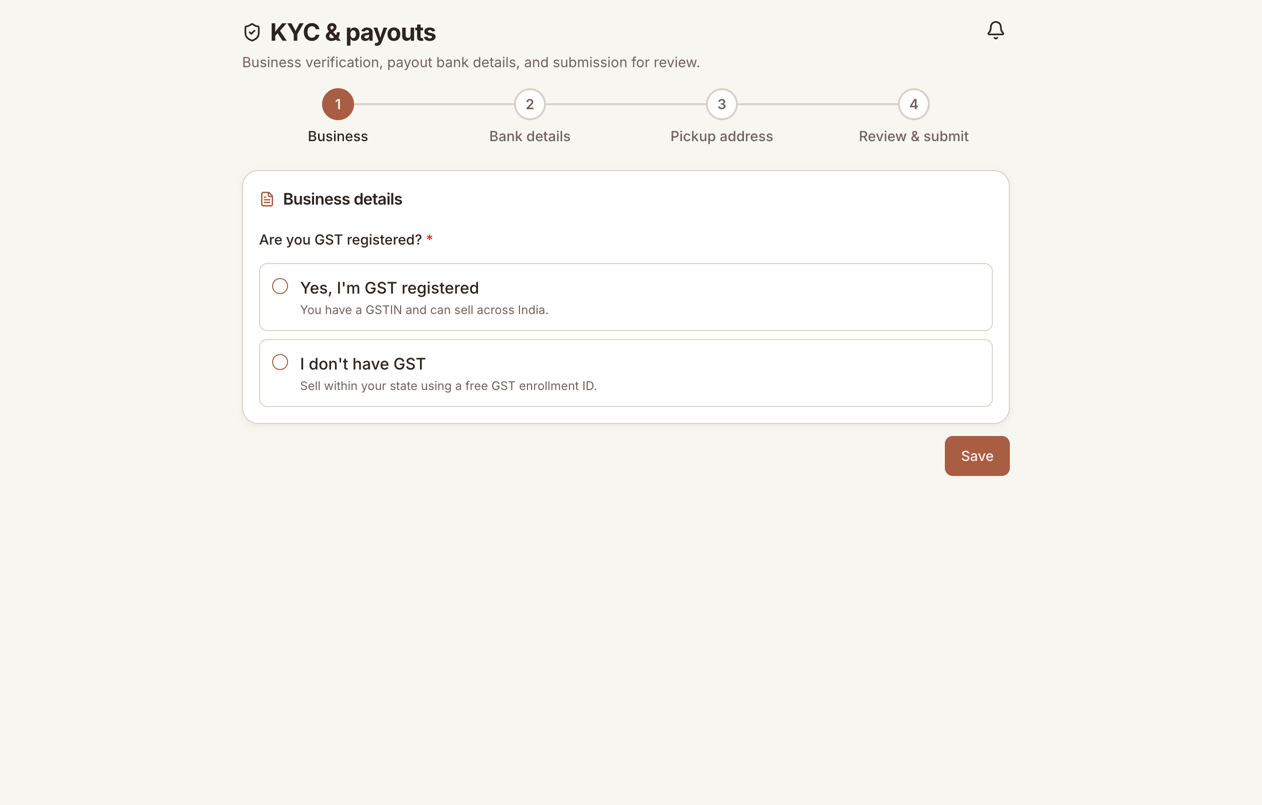
Business details
First, tell us whether you have a GST registration. Your answer changes what you fill in next.
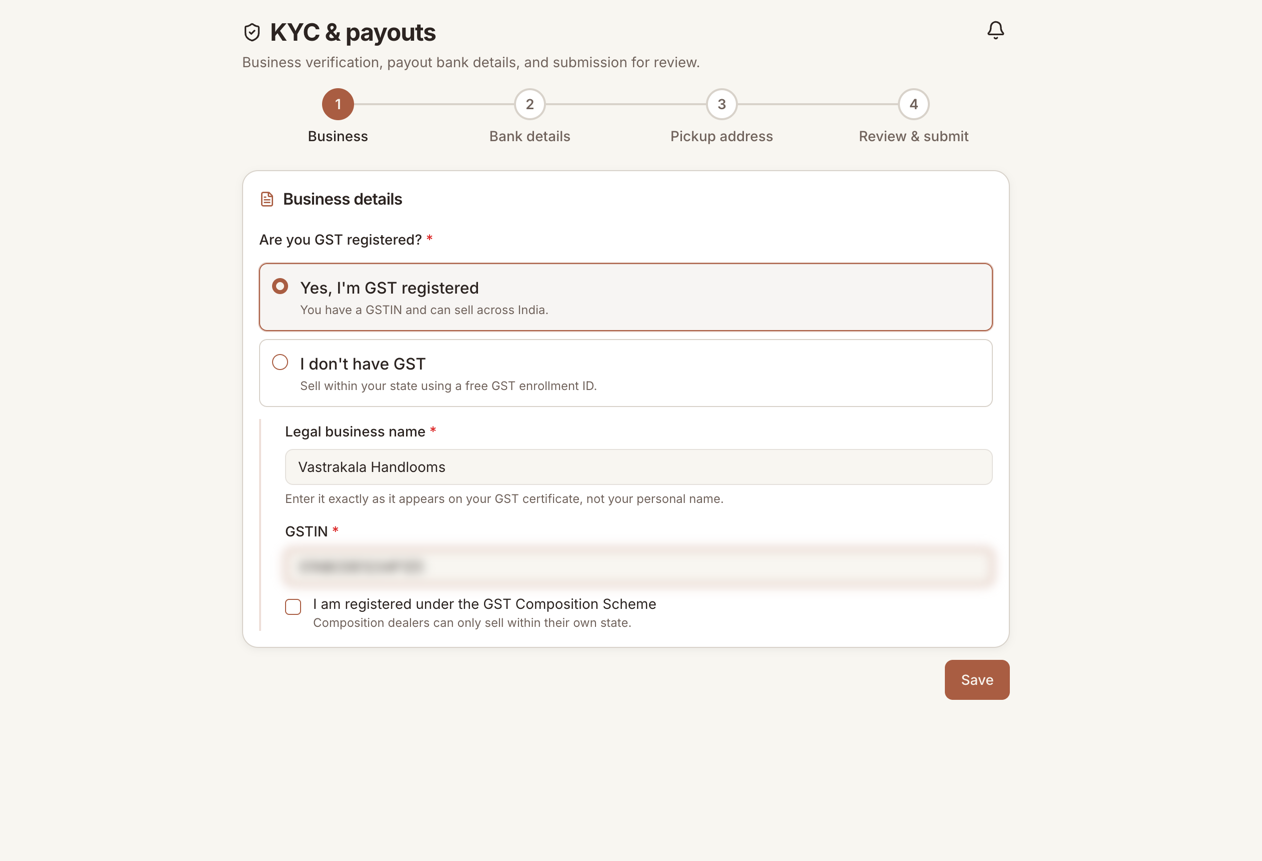
If you are GST registered, choose Yes, I'm GST registered, then enter your legal business name exactly as it appears on your GST certificate and your GSTIN. If you are on the GST Composition Scheme, tick that box, since composition dealers can sell only within their own state.
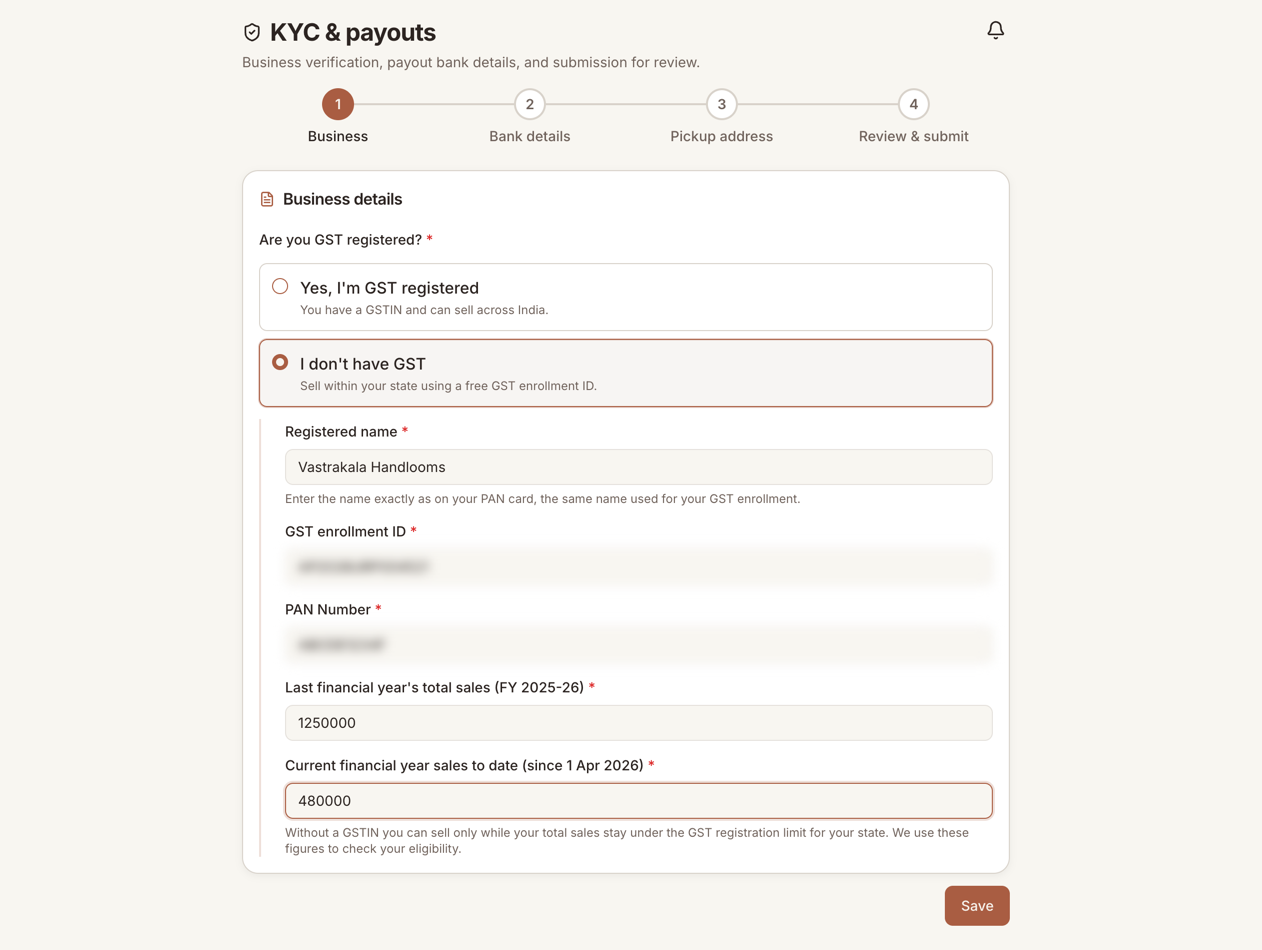
If you do not have GST, choose I don't have GST. Most small makers are here, and it is completely fine. You enter your registered name (as on your PAN), your PAN number, your free GST enrollment ID, and your total sales for last year and this year so far.
Do you need a GST number?
Whether you must register for GST depends on your turnover and your state. The registration threshold for selling goods is ₹40 lakh in most states, ₹20 lakh in some, and ₹10 lakh in a few special-category states. Below that, you can sell without a GSTIN, but only within your own state. We use the sales figures you enter to confirm you are under the limit. Many small makers sell GST-free for a long time. When you get close to the limit, register and add your GSTIN, and you can sell across India.
Bank details
This is where your payouts land. Enter the account holder name, account number (twice, to catch typos), and IFSC code exactly as they appear at your bank. A mismatch here is the most common reason a payout gets stuck, so check it carefully.
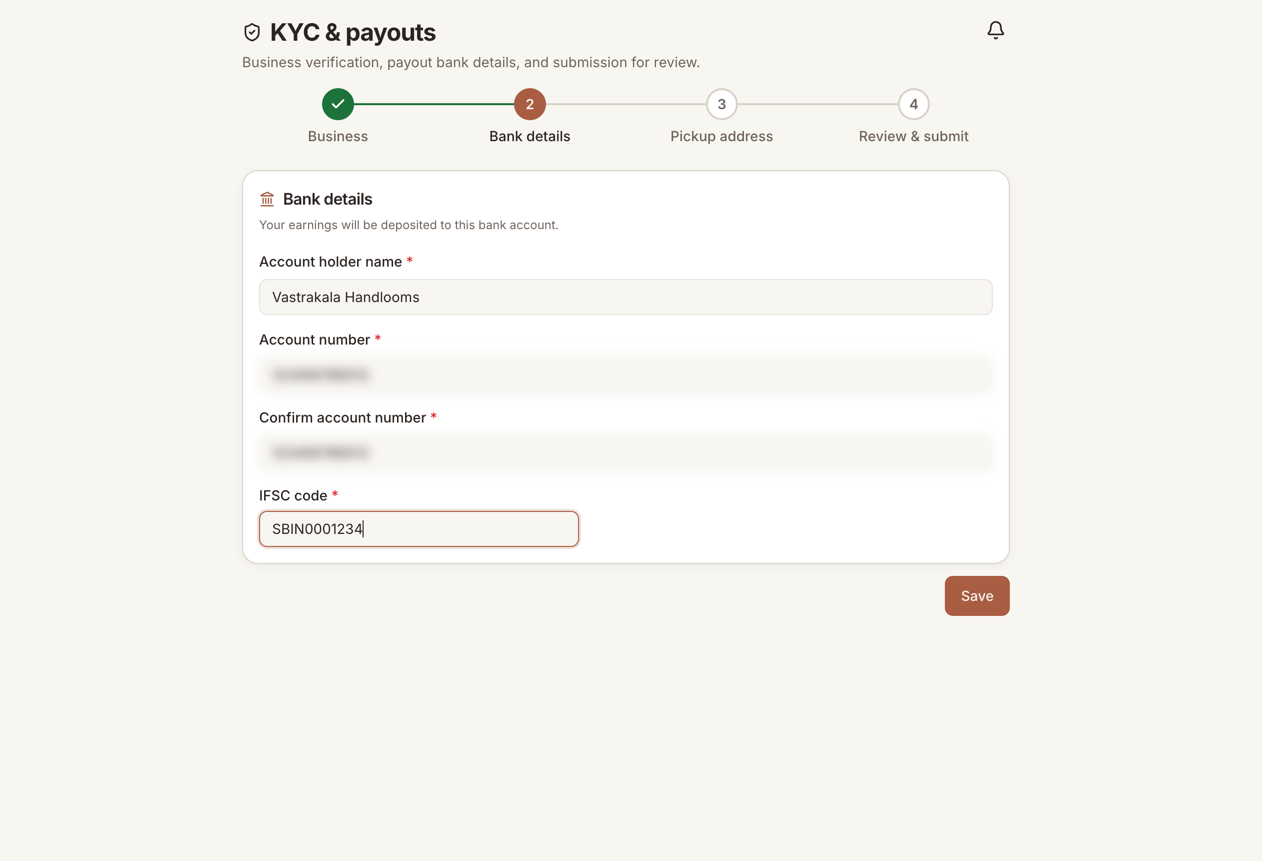
If you sell food, you also need an FSSAI registration or license number. This is a legal requirement for selling food in India, not an Indikala rule.
3. Add a pickup location
The third KYC step is your pickup address, the place the courier collects parcels from. Fill in the address, city, state, and pincode, or use Pick on map to drop a pin. This becomes your first pickup warehouse.
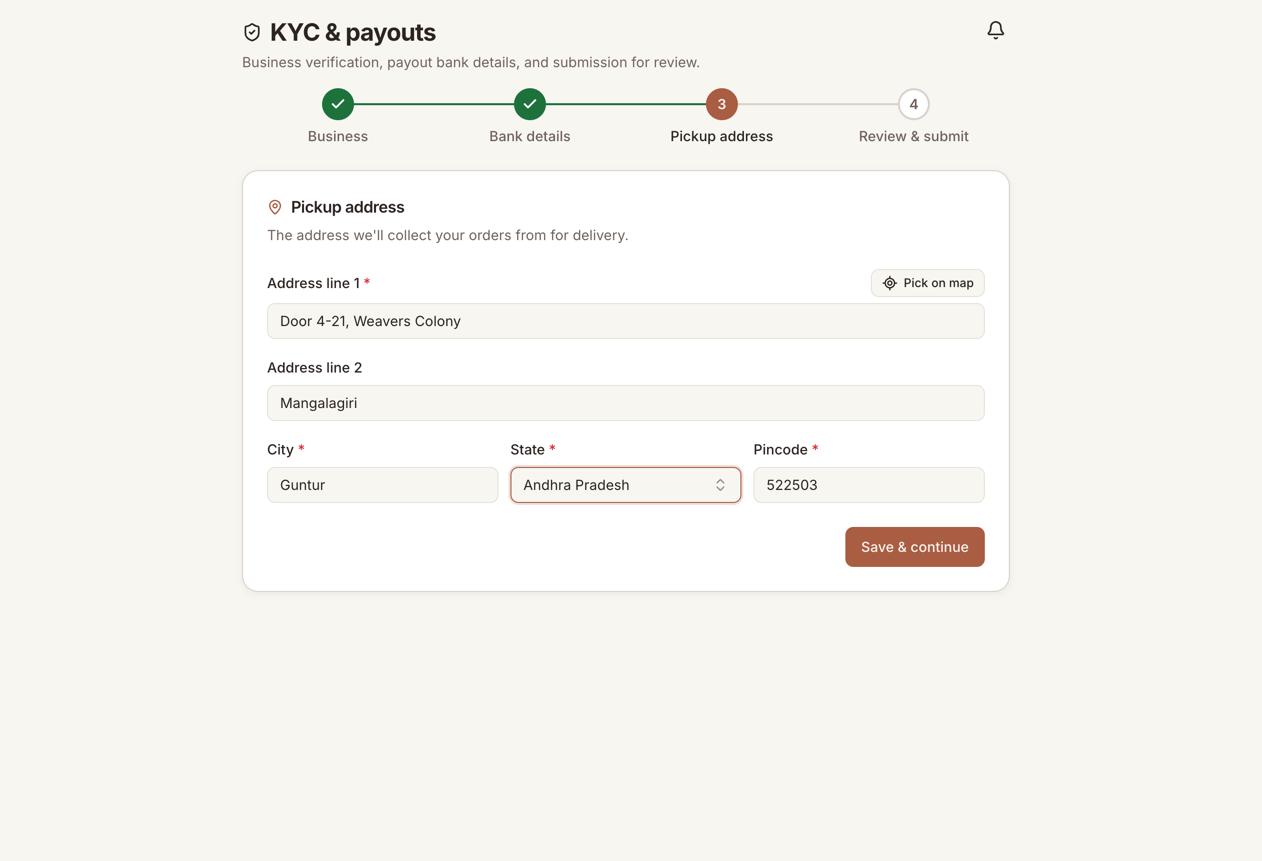
A pickup address cannot be edited once it is created, because it is registered with our courier partner. So enter it carefully. To add more locations later, or to change your default, use the Warehouses page.
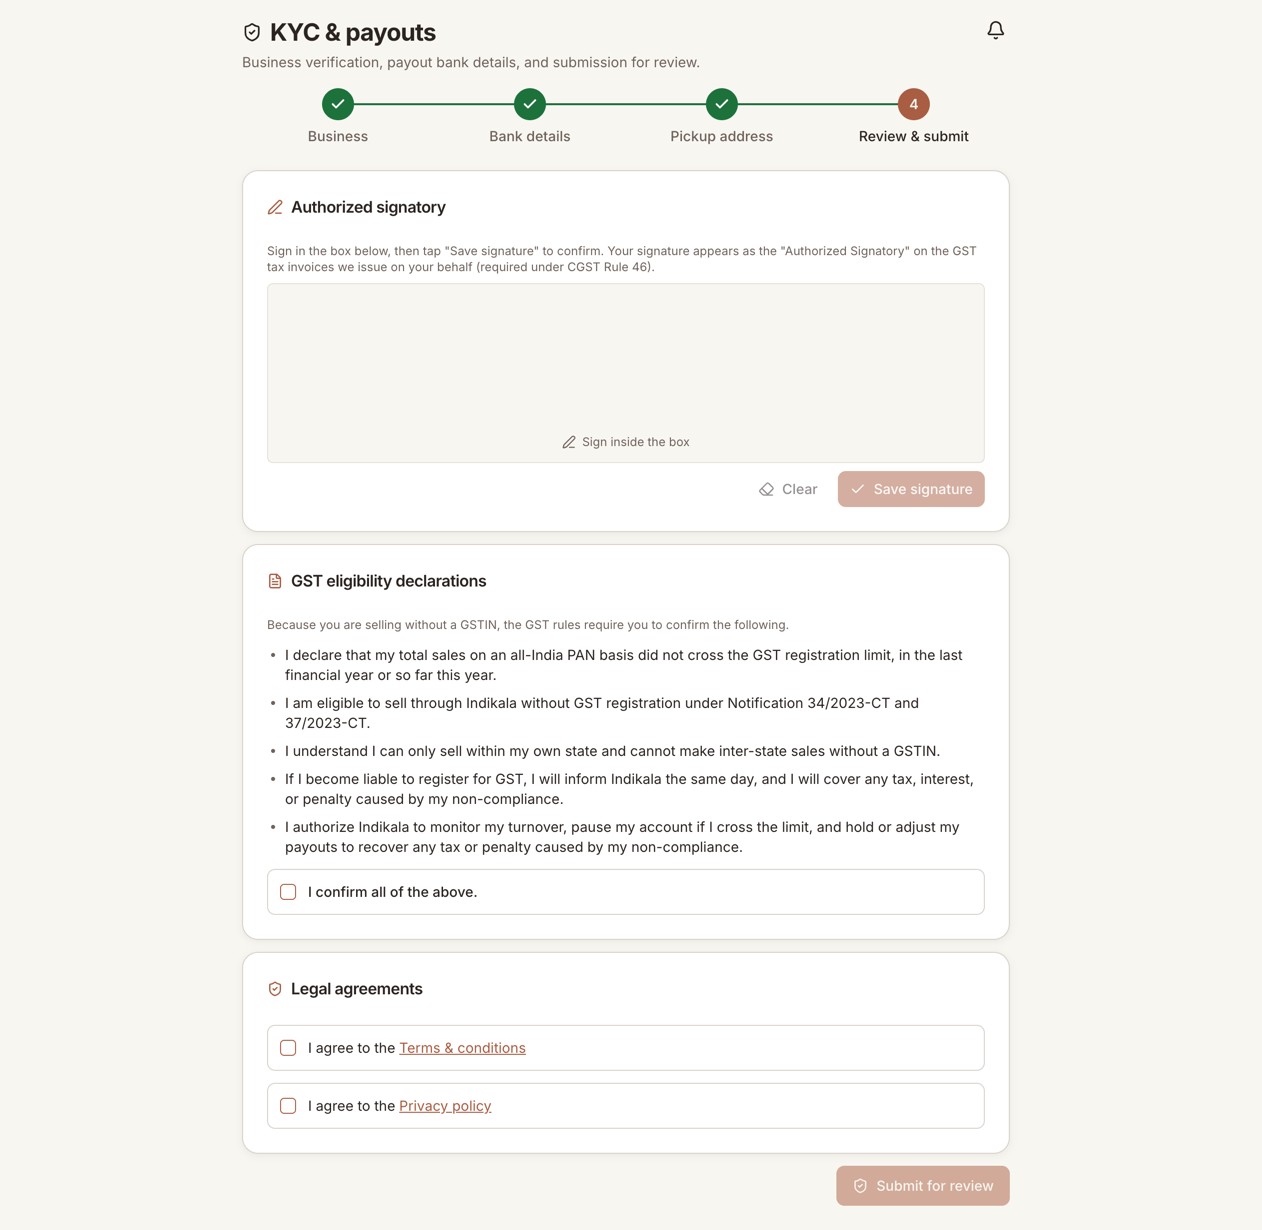
4. Submit for review and go live
The last KYC step is to sign and submit. Sign in the box. Your signature becomes the authorized signatory on the tax invoices we issue to buyers on your behalf, which the GST rules require. If you are selling without GST, you also tick a short set of eligibility declarations. Then agree to the terms and the privacy policy and submit.
Your dashboard shows a go-live checklist with seven steps:
- Store details
- Business details
- Bank and signature
- Pickup location
- Submit for review
- Verification
- Store live
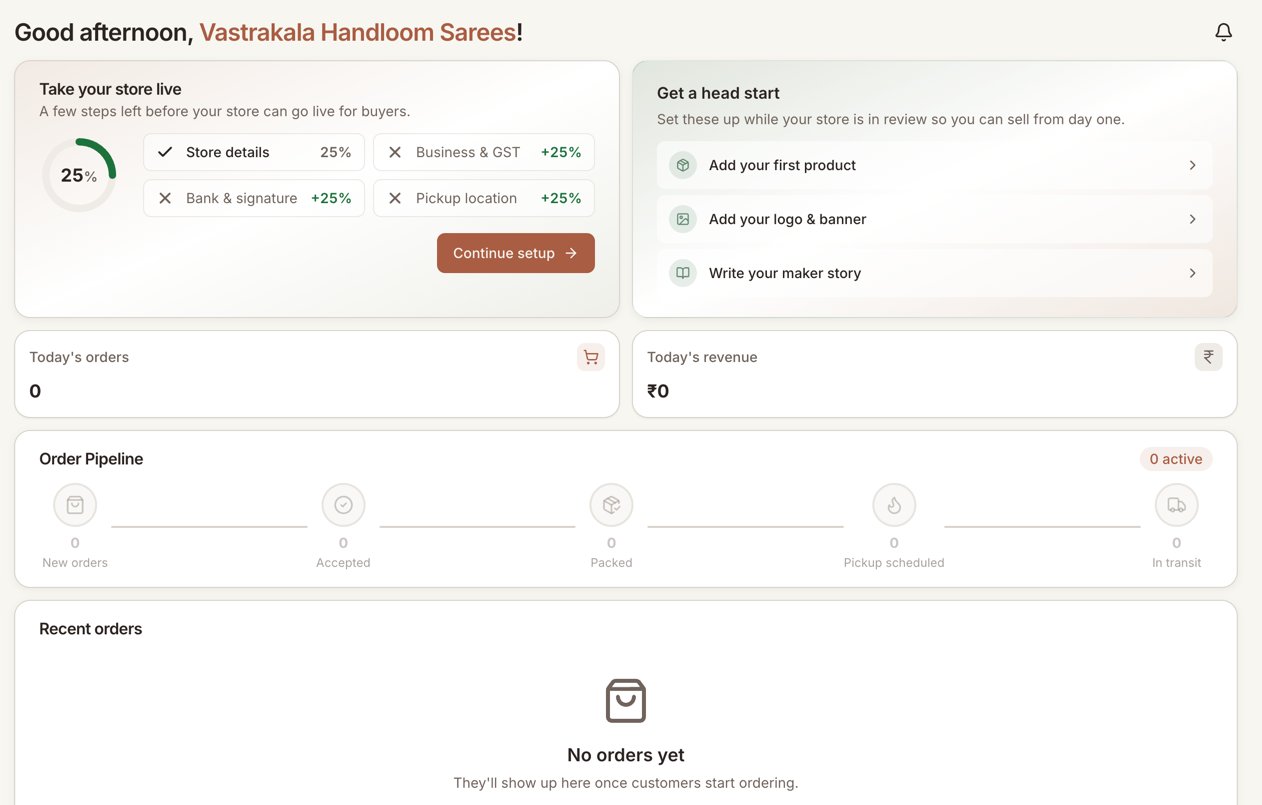
Once you submit, your store moves to under review, and you will see a banner that says so. We check your details quickly, usually in less than an hour. You can keep adding products and setting things up while you wait.
When you are approved, your store goes live. Buyers can now find you, and your Orders, Inventory, and other selling tools unlock.
Preview before you go live
While you are still under review, you can see exactly how your storefront will look to buyers. On your dashboard, use the Preview your store button. It opens a read-only version of your store in a new tab. Nothing there is public until you are approved.
Use the time while you wait
Approval is not a dead stop. While you are under review you can:
- Add your full product catalog, so day one is ready.
- Set your delivery preferences in Settings.
- Fill in your maker story and store profile, which is how buyers connect with what you make.
What if you are rejected?
If something is missing or does not check out, we will not leave you guessing. You will see the reason and what to fix, and you can update your details and submit again. If the reason is not clear, write to support@indikala.in and we will walk you through it.
Next
With your store set up, the next step is your catalog. See products and inventory.